Bathroom is usable! |
April 27th, 2019 |
| bathroom, house |
I wrote earlier about planning (December), demolition (January), and getting the framing underneath into shape (February). The previous post leaves off when I was ready to get my framing inspected.
The inspector was generally happy, though wanted a few minor changes. They said I was good to put down a strip of subfloor for the partition wall to sit on and another for the tub, though, so I wasn't blocked on those. I framed out a partition wall:
Doing a double top plate was silly: it should have been a double bottom plate. I needed to double one of them, because doubled I can use 8ft studs instead of something a bit longer, but it would have been much easier to work with having extra weight on the ground than the ceiling. Since the partition wall isn't load bearing there's a plate over the door opening instead of a header.
The plumber came in and ran their new plumbing around my repaired framing. New PVC stack to replace the section we needed to remove for the column:
Supply and drain for the tub and toilet:
You can also see that I filled the cavity below the tub with insulation. This is kind of a weird way to do this: normally you'd go down there and put batts between the studs. But I had a huge amount of pink stuff left over from when our attic was conditioned (it's spray foam now) so I just filled the whole 4x4x6 cube.
I framed out an alcove for the tub:
Unfortunately I hadn't understood how a tub drain works (it goes straight down from the overflow, not from the drain hole) which meant with this orientation the drain landed right on a joist. I needed to take this framing down and redo it six inches over, with the alcove coming in on both sides instead of just one.
Once the framing was fixed the plumber could put in the tub:
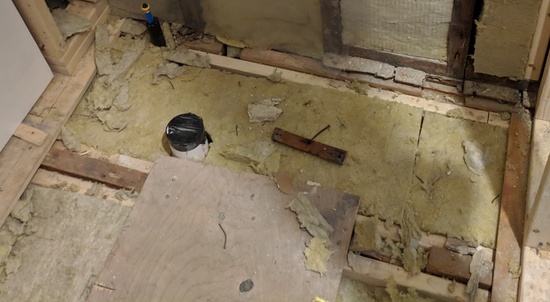
I insulated the floor between the units to reduce noise transmission:
I also insulated the walls, and put up a vapor barrier:
For the hallway flooring we decided to use prefinished hardwood. Oak in "gunstock", 3/4" thick, 3 1/4" strips. It doesn't look exactly like the floor it's joining, but it's close enough. And I was able to tie it in to the existing tongue and groove so I didn't need a threshold. (Pretty neat for two sections of flooring manufactured a hundred years apart!)
At this point I did some counting and realized I only had two more weekends to work on this between then and mid June! I stopped trying to make progress evenly, and started just trying to get the bathroom to a state where we could use the sink and toilet.
The old bathroom ceiling was wallpaper in sad shape. I scraped the bathroom section, but left the now-hall section for later:
I put up the doors, one to the bedroom and one to the bathroom. I've now done about six pre-hung doors and I think I'm getting the hang of it. These two are way better than any of the ones I've done before.
Rick helped me put up the drywall, and all the two person-parts we were able to get done in one day.
We decided to use an acrylic tub surround, direct to stud so no drywall there. I wanted to wait to put it up until the window was in, because there was an outside chance that I would need to change how the window was framed. Everything was fine, though, so I cut out a section of the surround for the window and put it up:
With the surround up I could get my screw inspection, and then start finishing the drywall. I used setting-type compound, which meant I could do the whole sink and toilet area in one day, and then Julia could paint the next day.
I put down a sheet of vinyl flooring. It's a small enough area that I did it floating, the way I did the upstairs bathroom. It's held down by the trim around the edges and a little metal transition strip at the doorway.
The next week the plumber came back to install the sink and toilet, and here we go!
- Transportation Tracking
- Drawing on Walls
- Kids and Time
- Spending Update 2020
- Bathroom Construction Cost Comparison
- Residential Demolition Tooling
- Gut Renovating Another Bathroom
Comment via: facebook


